You Wouldn't Download A Shirt
I've been dealing with some fun post-graduation burn out and medical issues which has caused me to take extended breaks from my laptop (which is also quite a bit broken). In these "breaks", I started resizing a bunch of my button down shirts. Since a lot of my shirts were a size too big, I didn't wear them. I then realized I have basic sewing skills and a small sewing machine, so I fiddled around with resizing them on my own, which was going great until I got to the sleeves which never came out right.
I did what anyone would do in my situation. I found a shirt I did like the fit of, but wasn't emotionally attached to. I took an exacto knife and careful took apart all the seams, taking notes along the way. Then, I ironed all the pieces flat and traced them onto parchment paper. I took my notes, reversed them, then used them to put the shirt back together.
Since everything worked, I've typed up my notes (and made my drawings much more legible) so that I don't ever lose them. I've used this pattern to resize 4 shirts and make 3 entirely from scratch. I'm having a lot of fun.
When I get a chance, I might use a CAD program to draw up the full pattern and make it available here. That does require relearning how to use CAD programs. For now, you'll have to settle for my definitely not to scale doodles.

Overview
Pattern Pieces
- A : Front Panel
- B : Back Panel
- C : Shoulder Panel
- D : Sleeve
- E : Collar
- F : Neckline
- G : Pocket
Connect Back and Shoulders
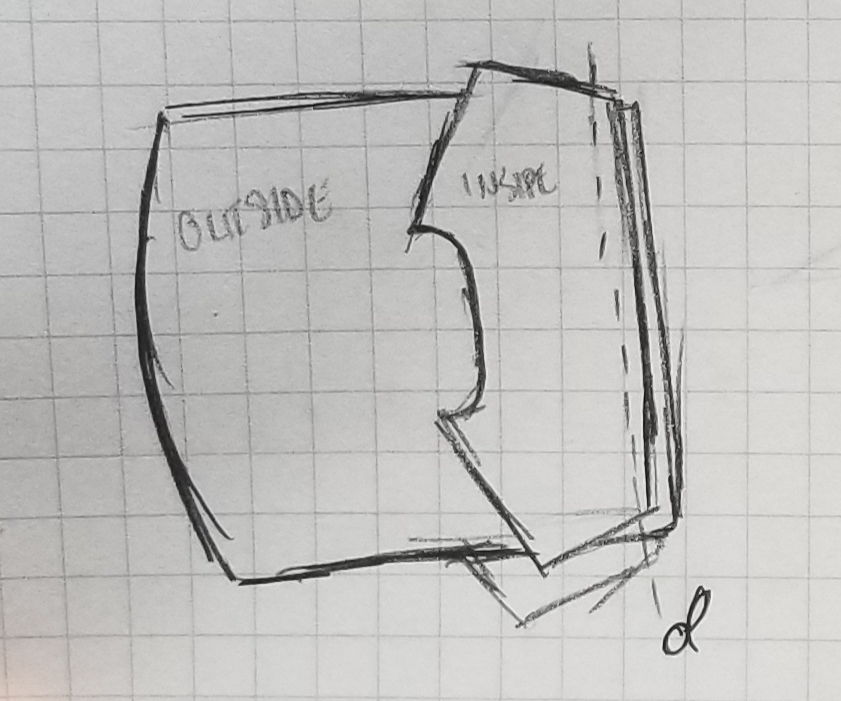
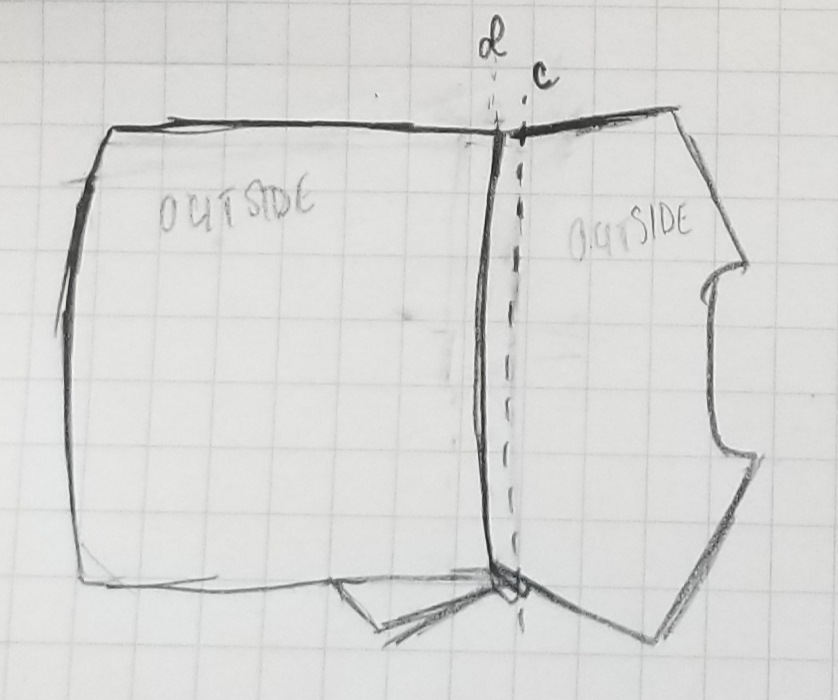
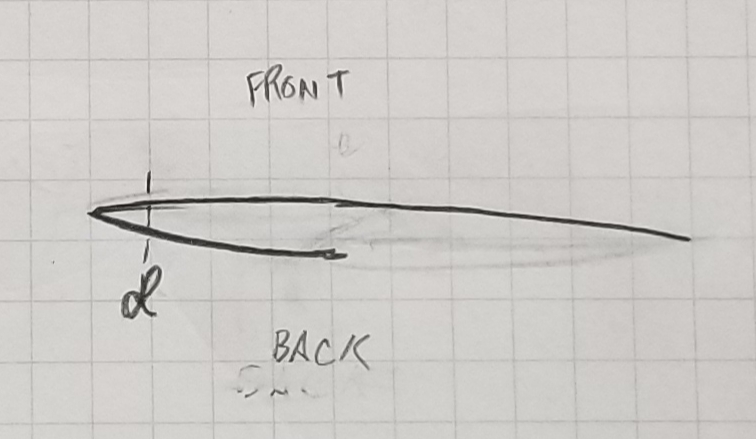
Sew the top edge of B to the bottom edges of C (insides of C together). The seam should be 1/2 inch from the edge of the fabric. In my drawing, this is seam d.
Open up one C. Open up the one that has is the "back" of the shirt. Sew it down 1/4 in from d This is seam c.
Sew Button Lines
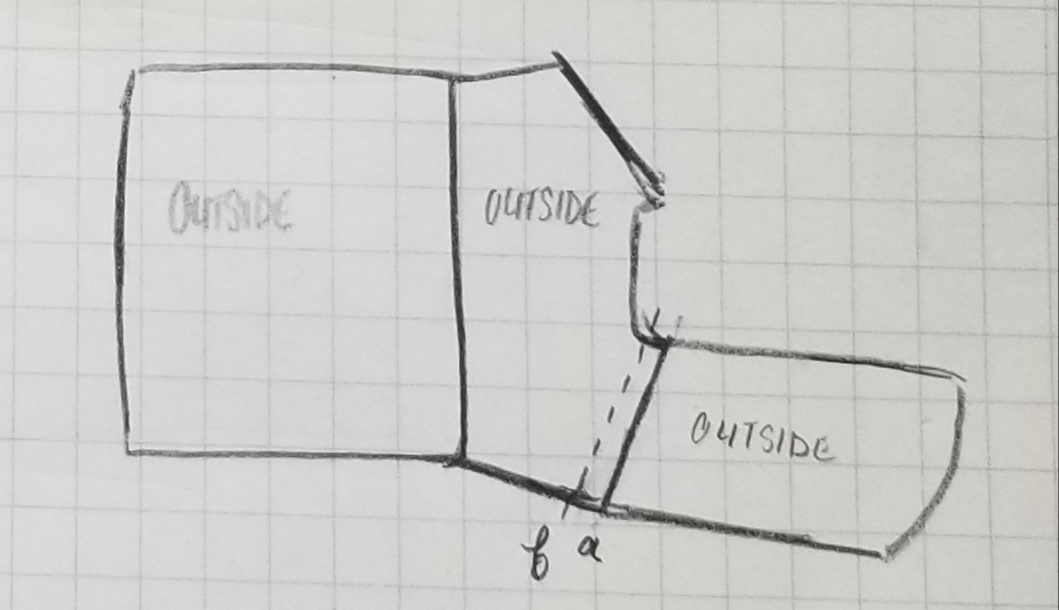
Looking at the garment, the left panel is the one with the buttons, the right is the one with the button holes. The left panel should be 1/2 "shorter" than the right. I guess left vs right doesn't matter so much. I just drew them on the left and right in my images.
The left side is easy. Fold 1/2 in, then again at 1in. The second fold (b) is the edge of the garment. Sew seam a 3/4 in from the edge.
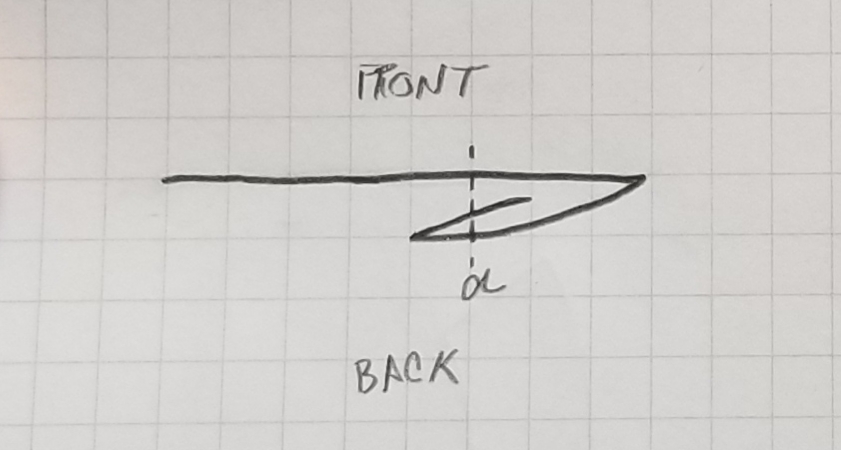
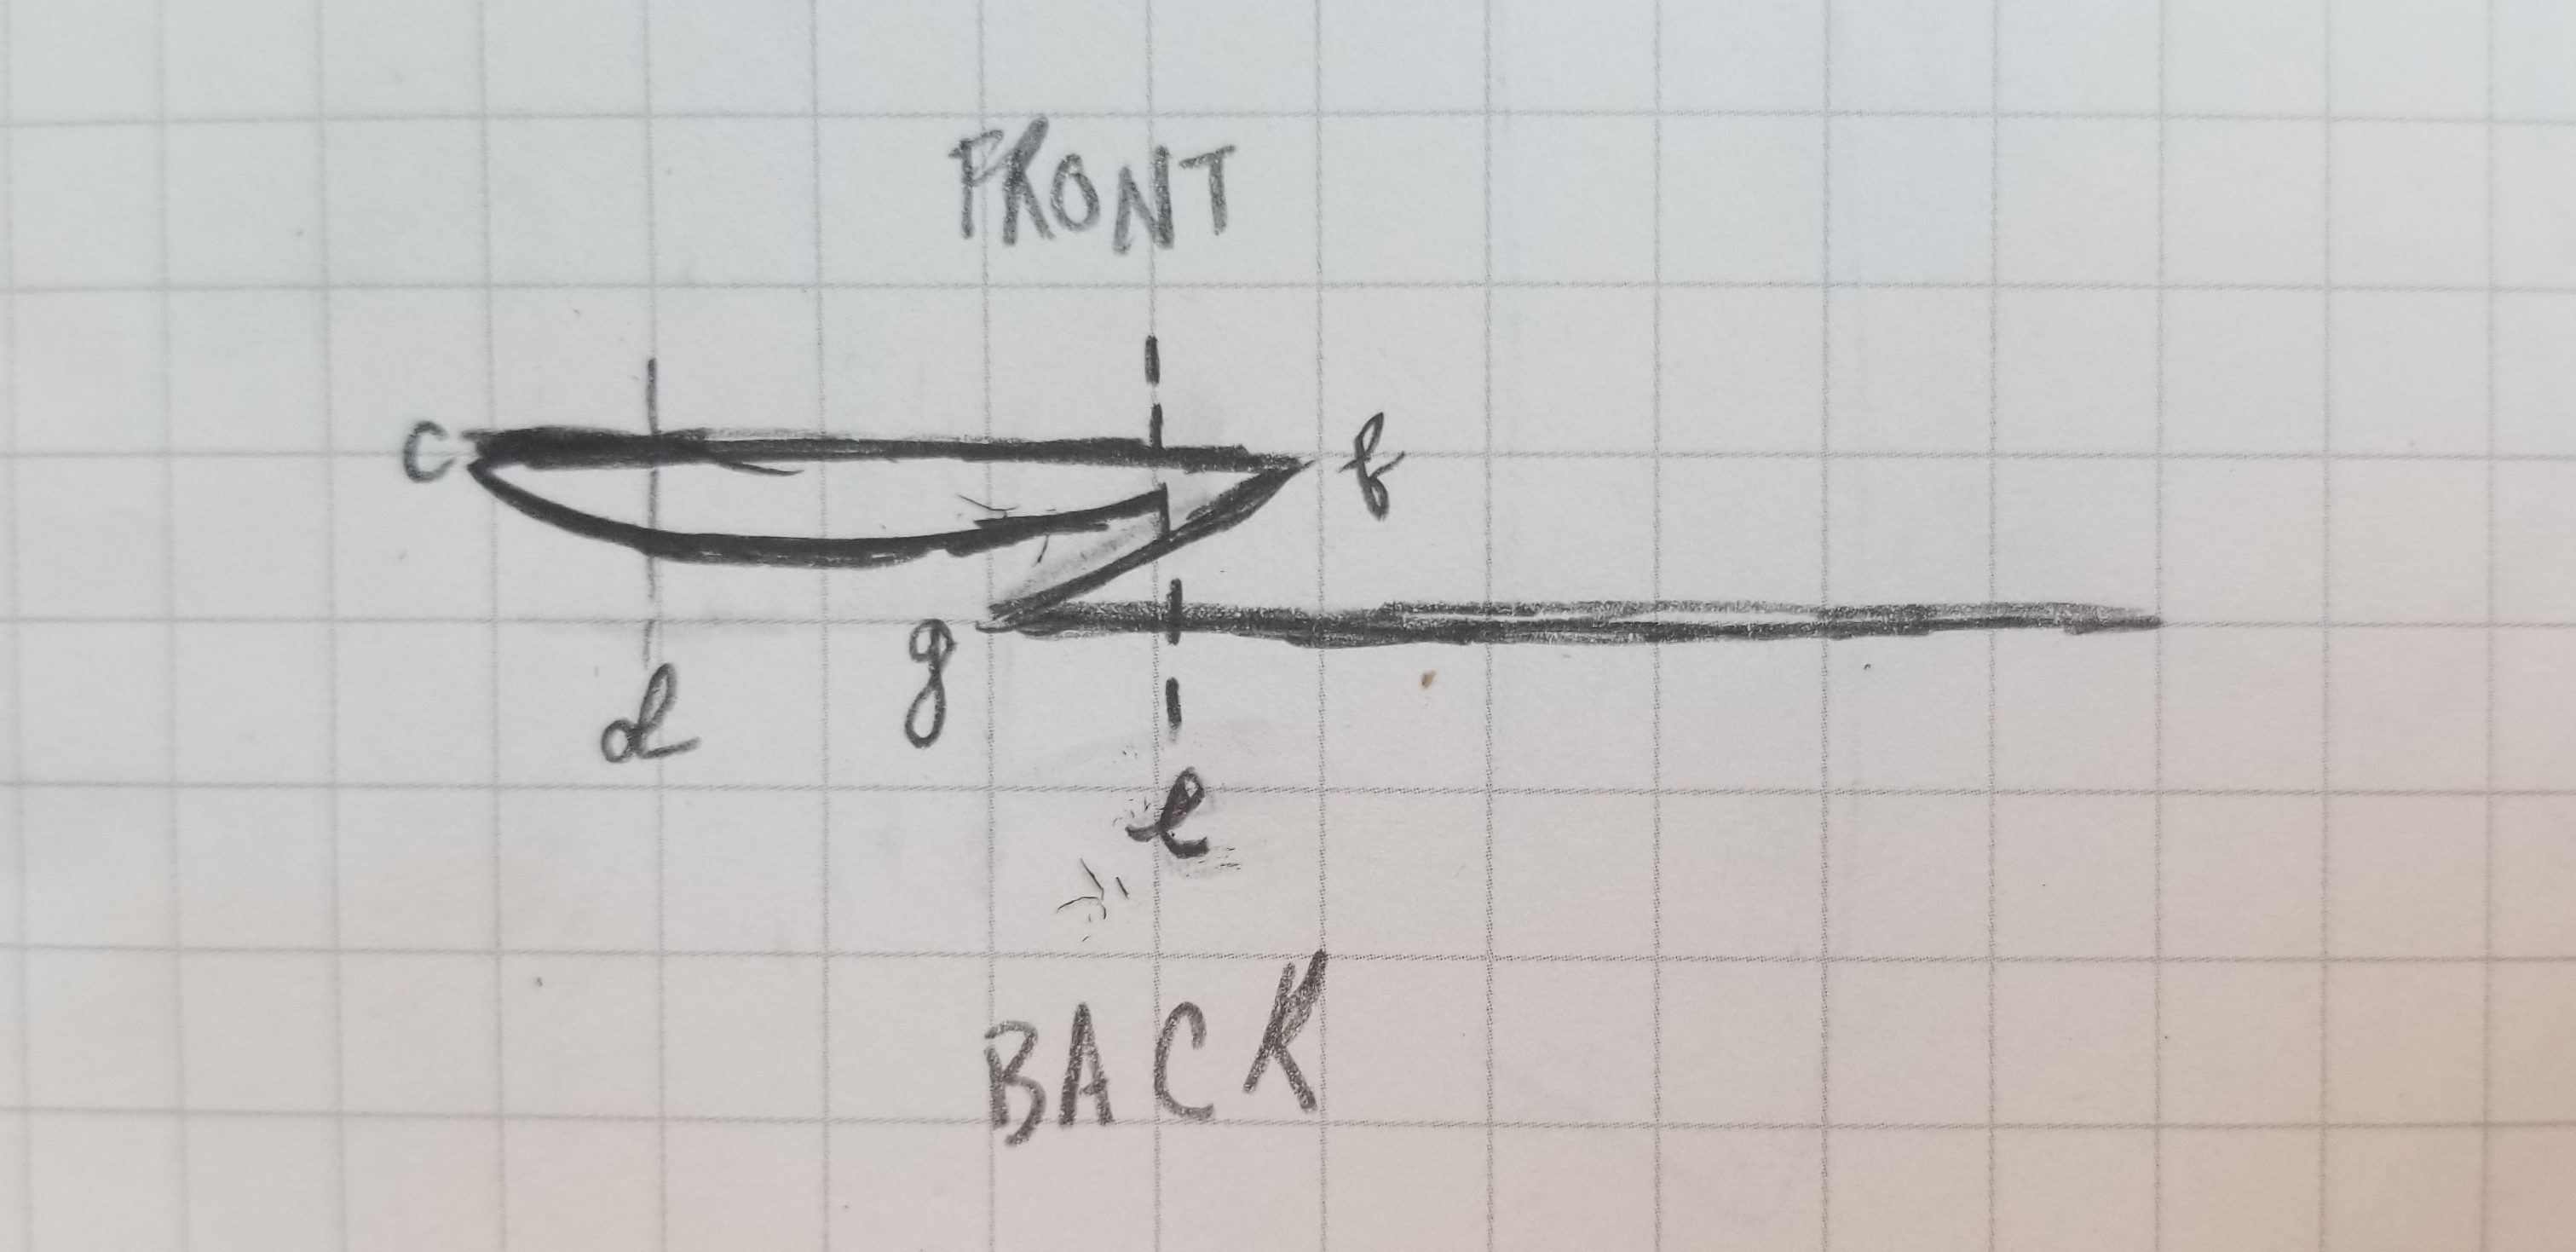
The right side takes more work. Fold along c which is a little over 1 in from the edge. Sew d 1/4 in from fold c.
Fold along f which is 1 1/4 in from c. Fold g 1/2 in from f and iron flat. Sew e 1/4 in from f.
Buttons
Buttons can be added now and the button holes can be made. I like this video by Cat's Costumery on hand sewing button holes and other button options.
I never actually do this now, I typically wait until the shirt is fully made.
Sew Pocket
If a pocket is being added, it'll get added to the left panel (or right I guess it doesn't matter).
- Fold in all the edges of G by 1/2 in. Iron flat.
- Fold along the fold line. Sew this down along the edge 1 inch into the pocket.
- Place G on top of A and sew as close to the folded edge as possible. Leave the top open.
Attach Front to Shoulders
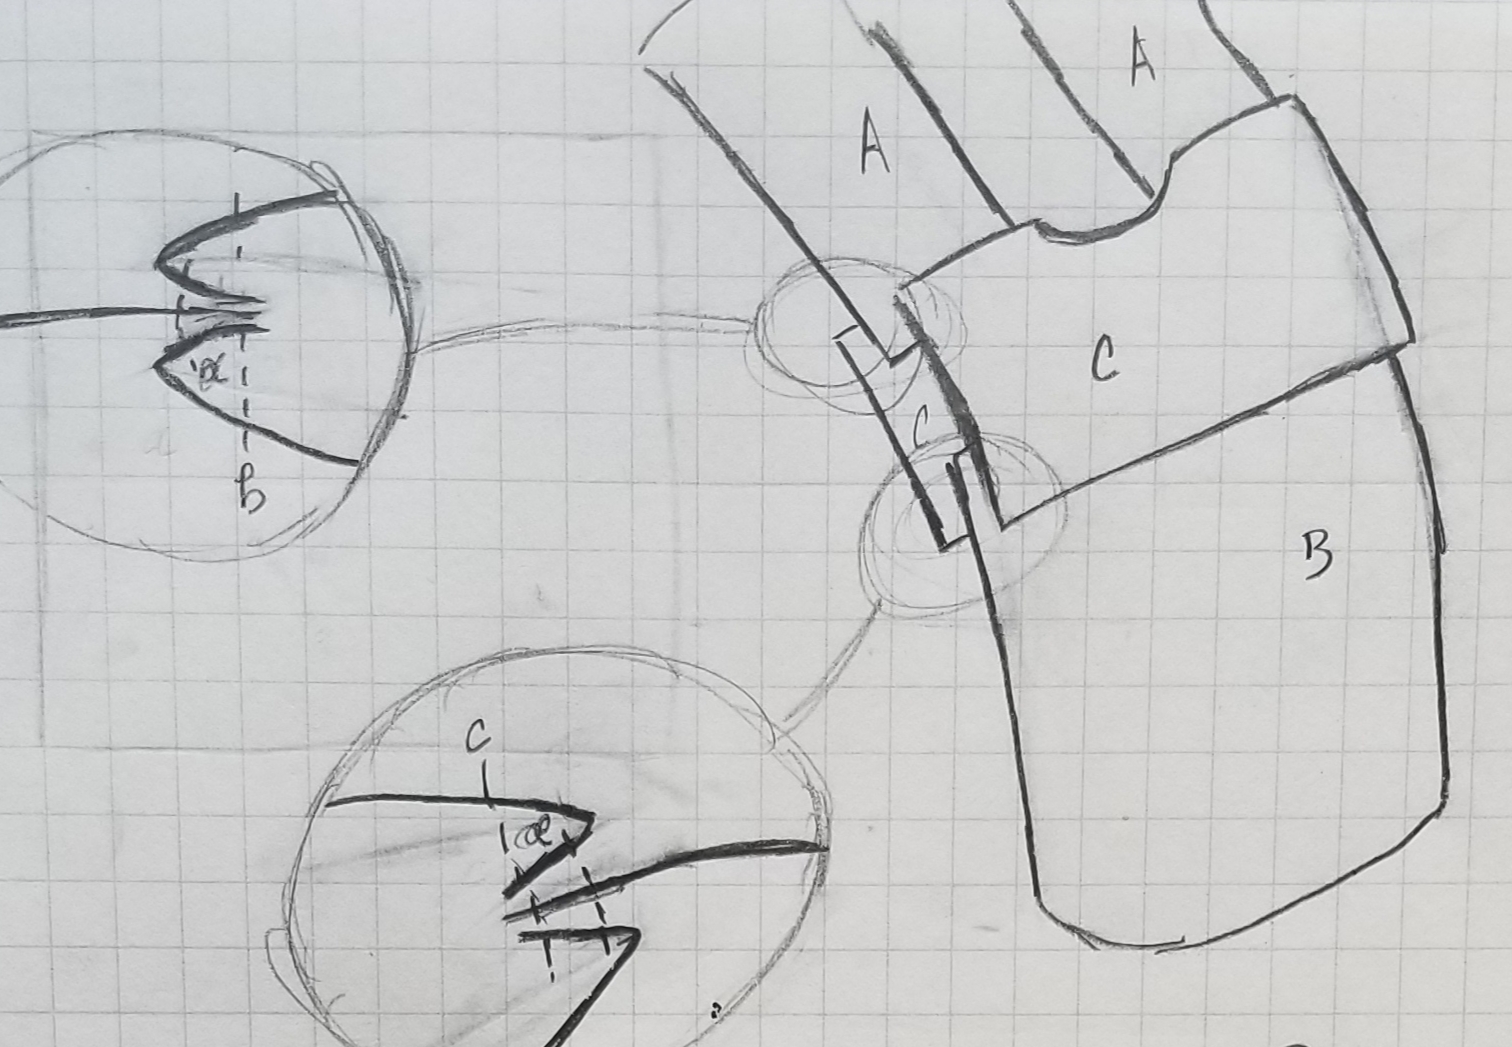
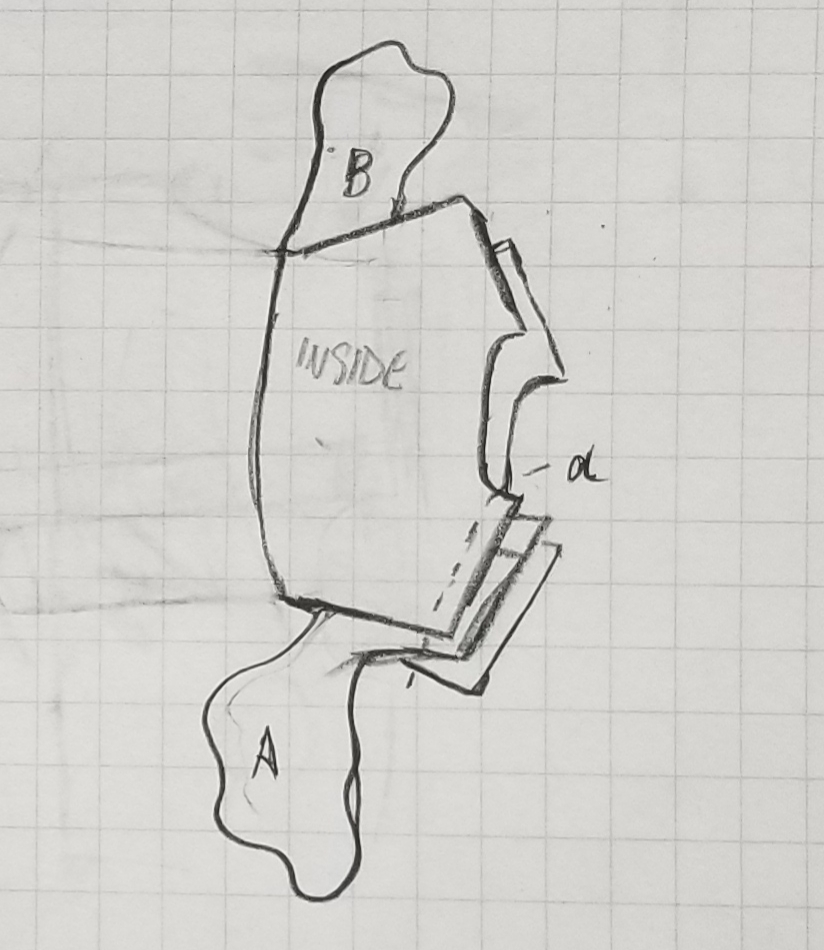
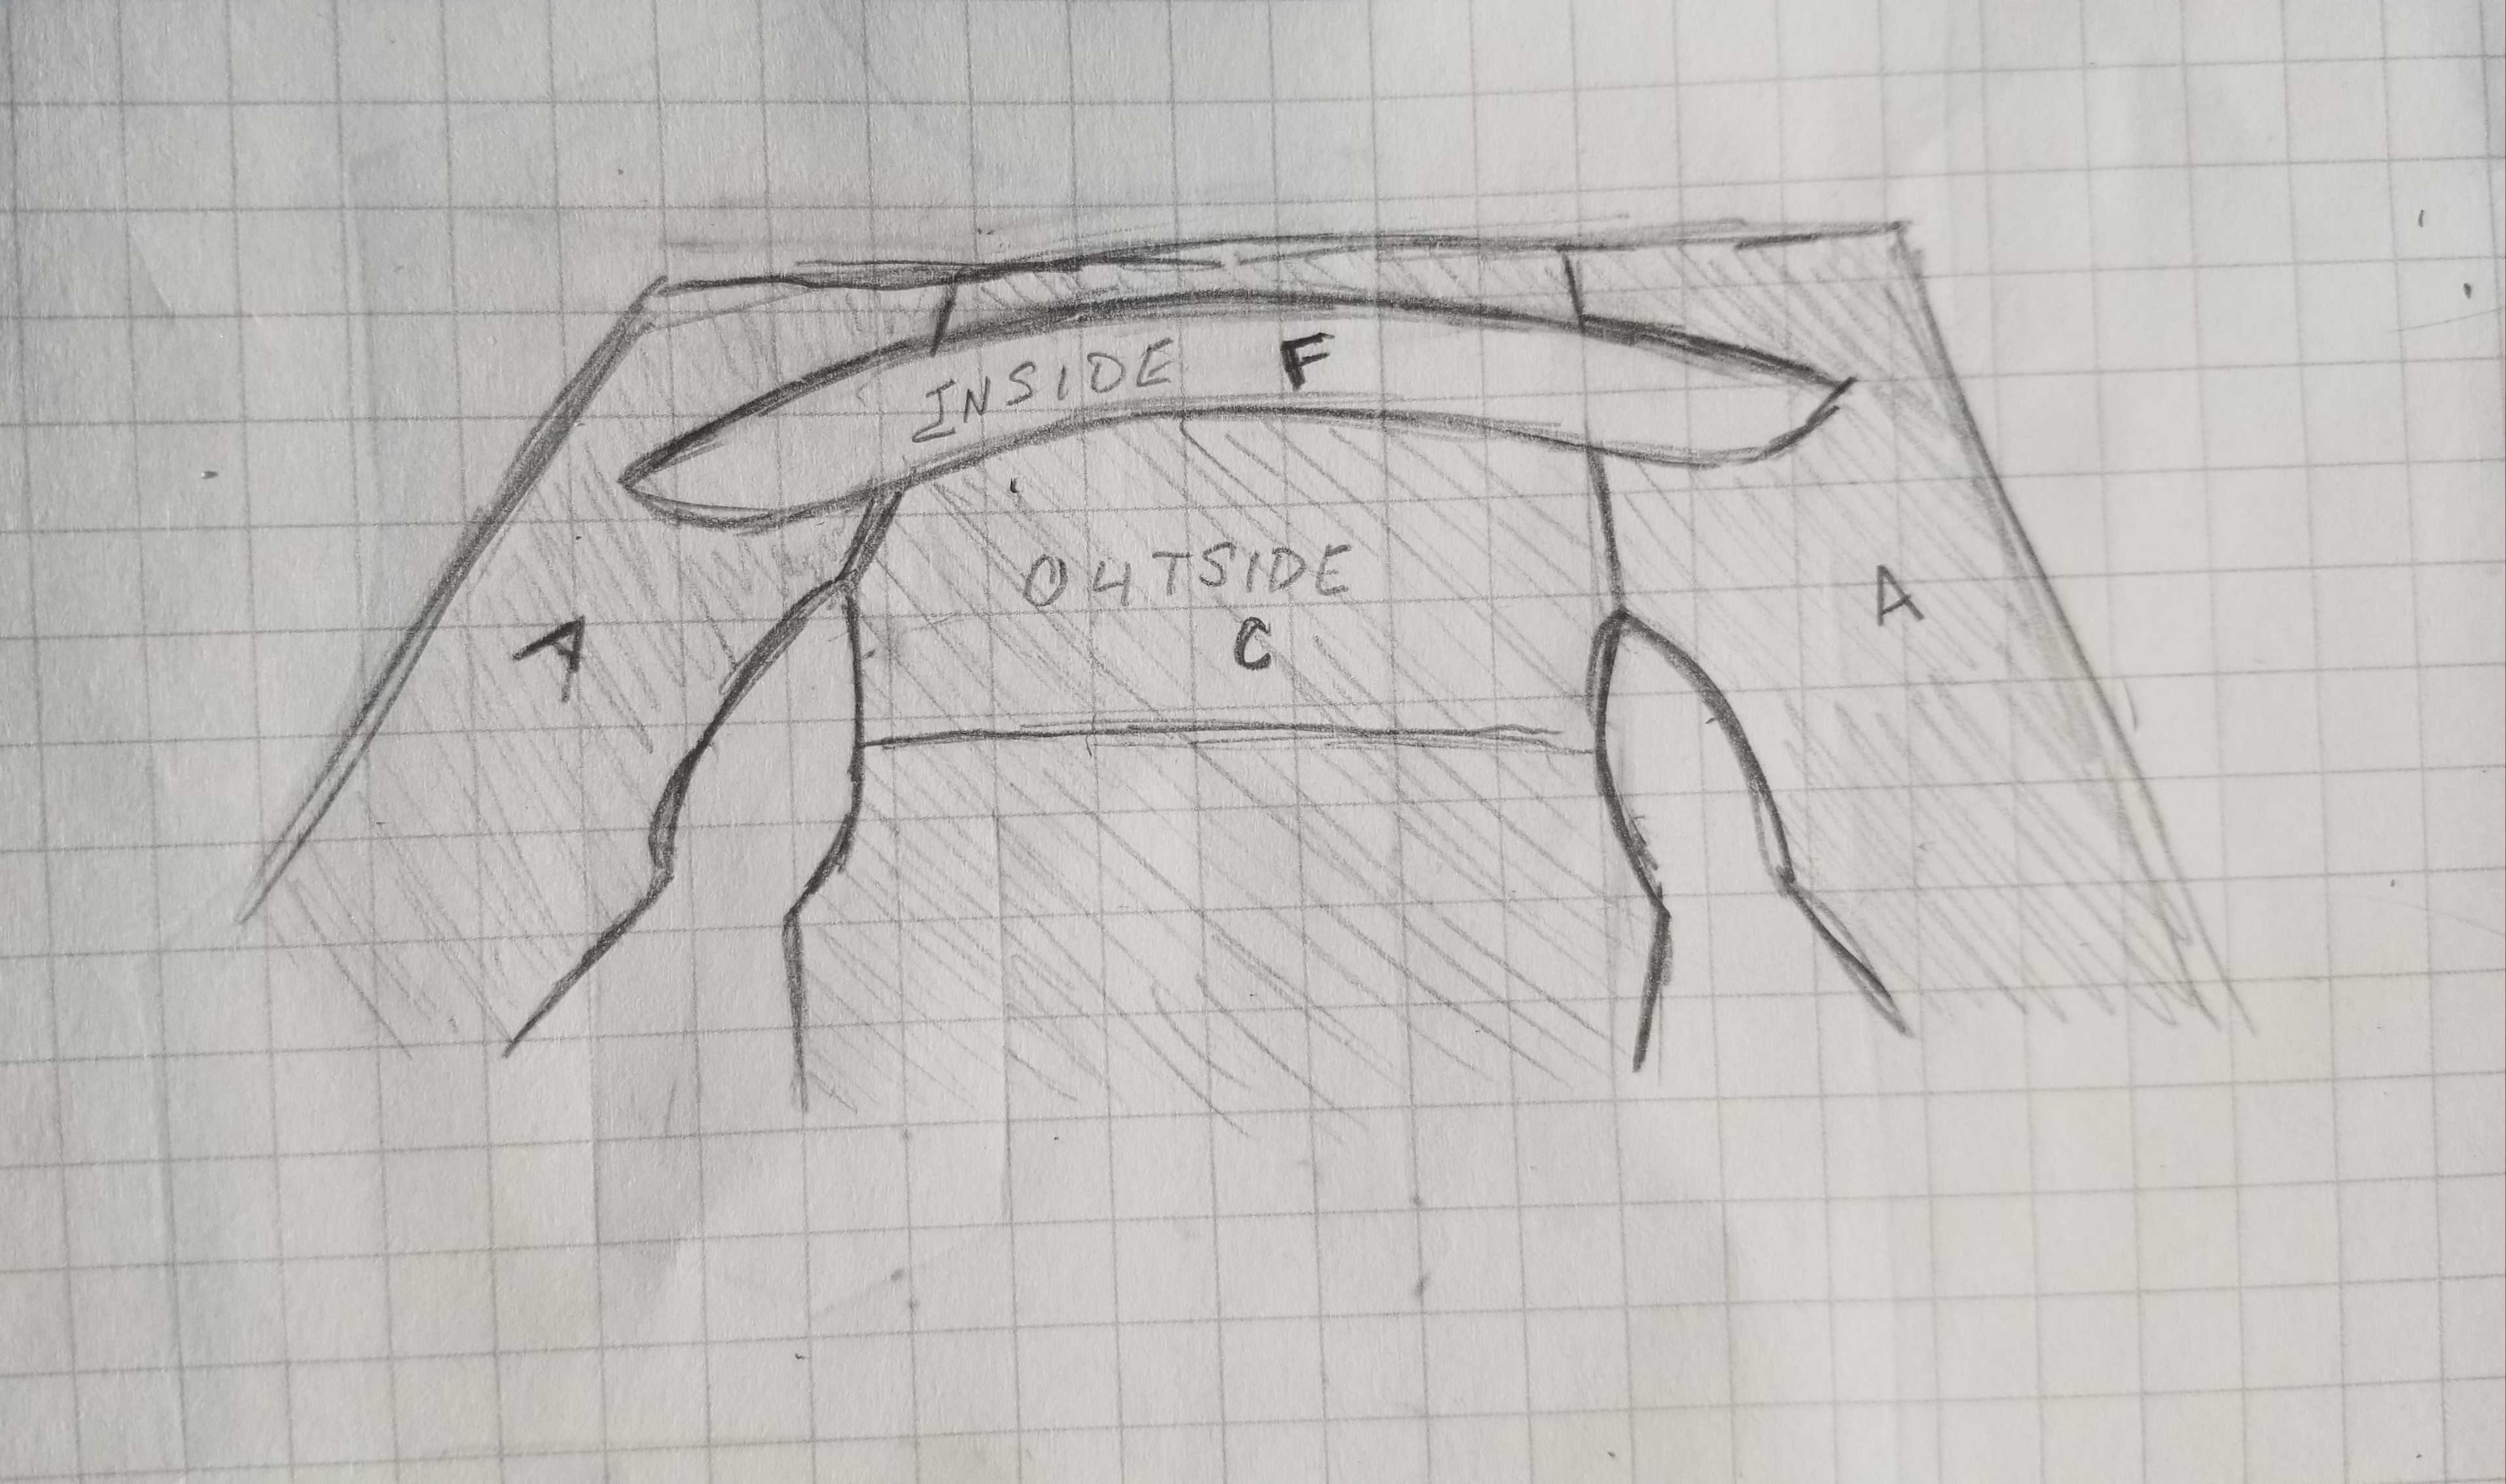
Attaching the front panels is wonky. To do the initial seam (a) where the insides of C are together, both A and B are going to have to be crumpled and moved out of the way. as long as the seam is straight, it's fine. Then a gets sewn 1/2 in from the edge.
Flip everything right side out and uncrumple everything. Then sew b 1/4 in from a.
Repeat for both panels.
Build Collar
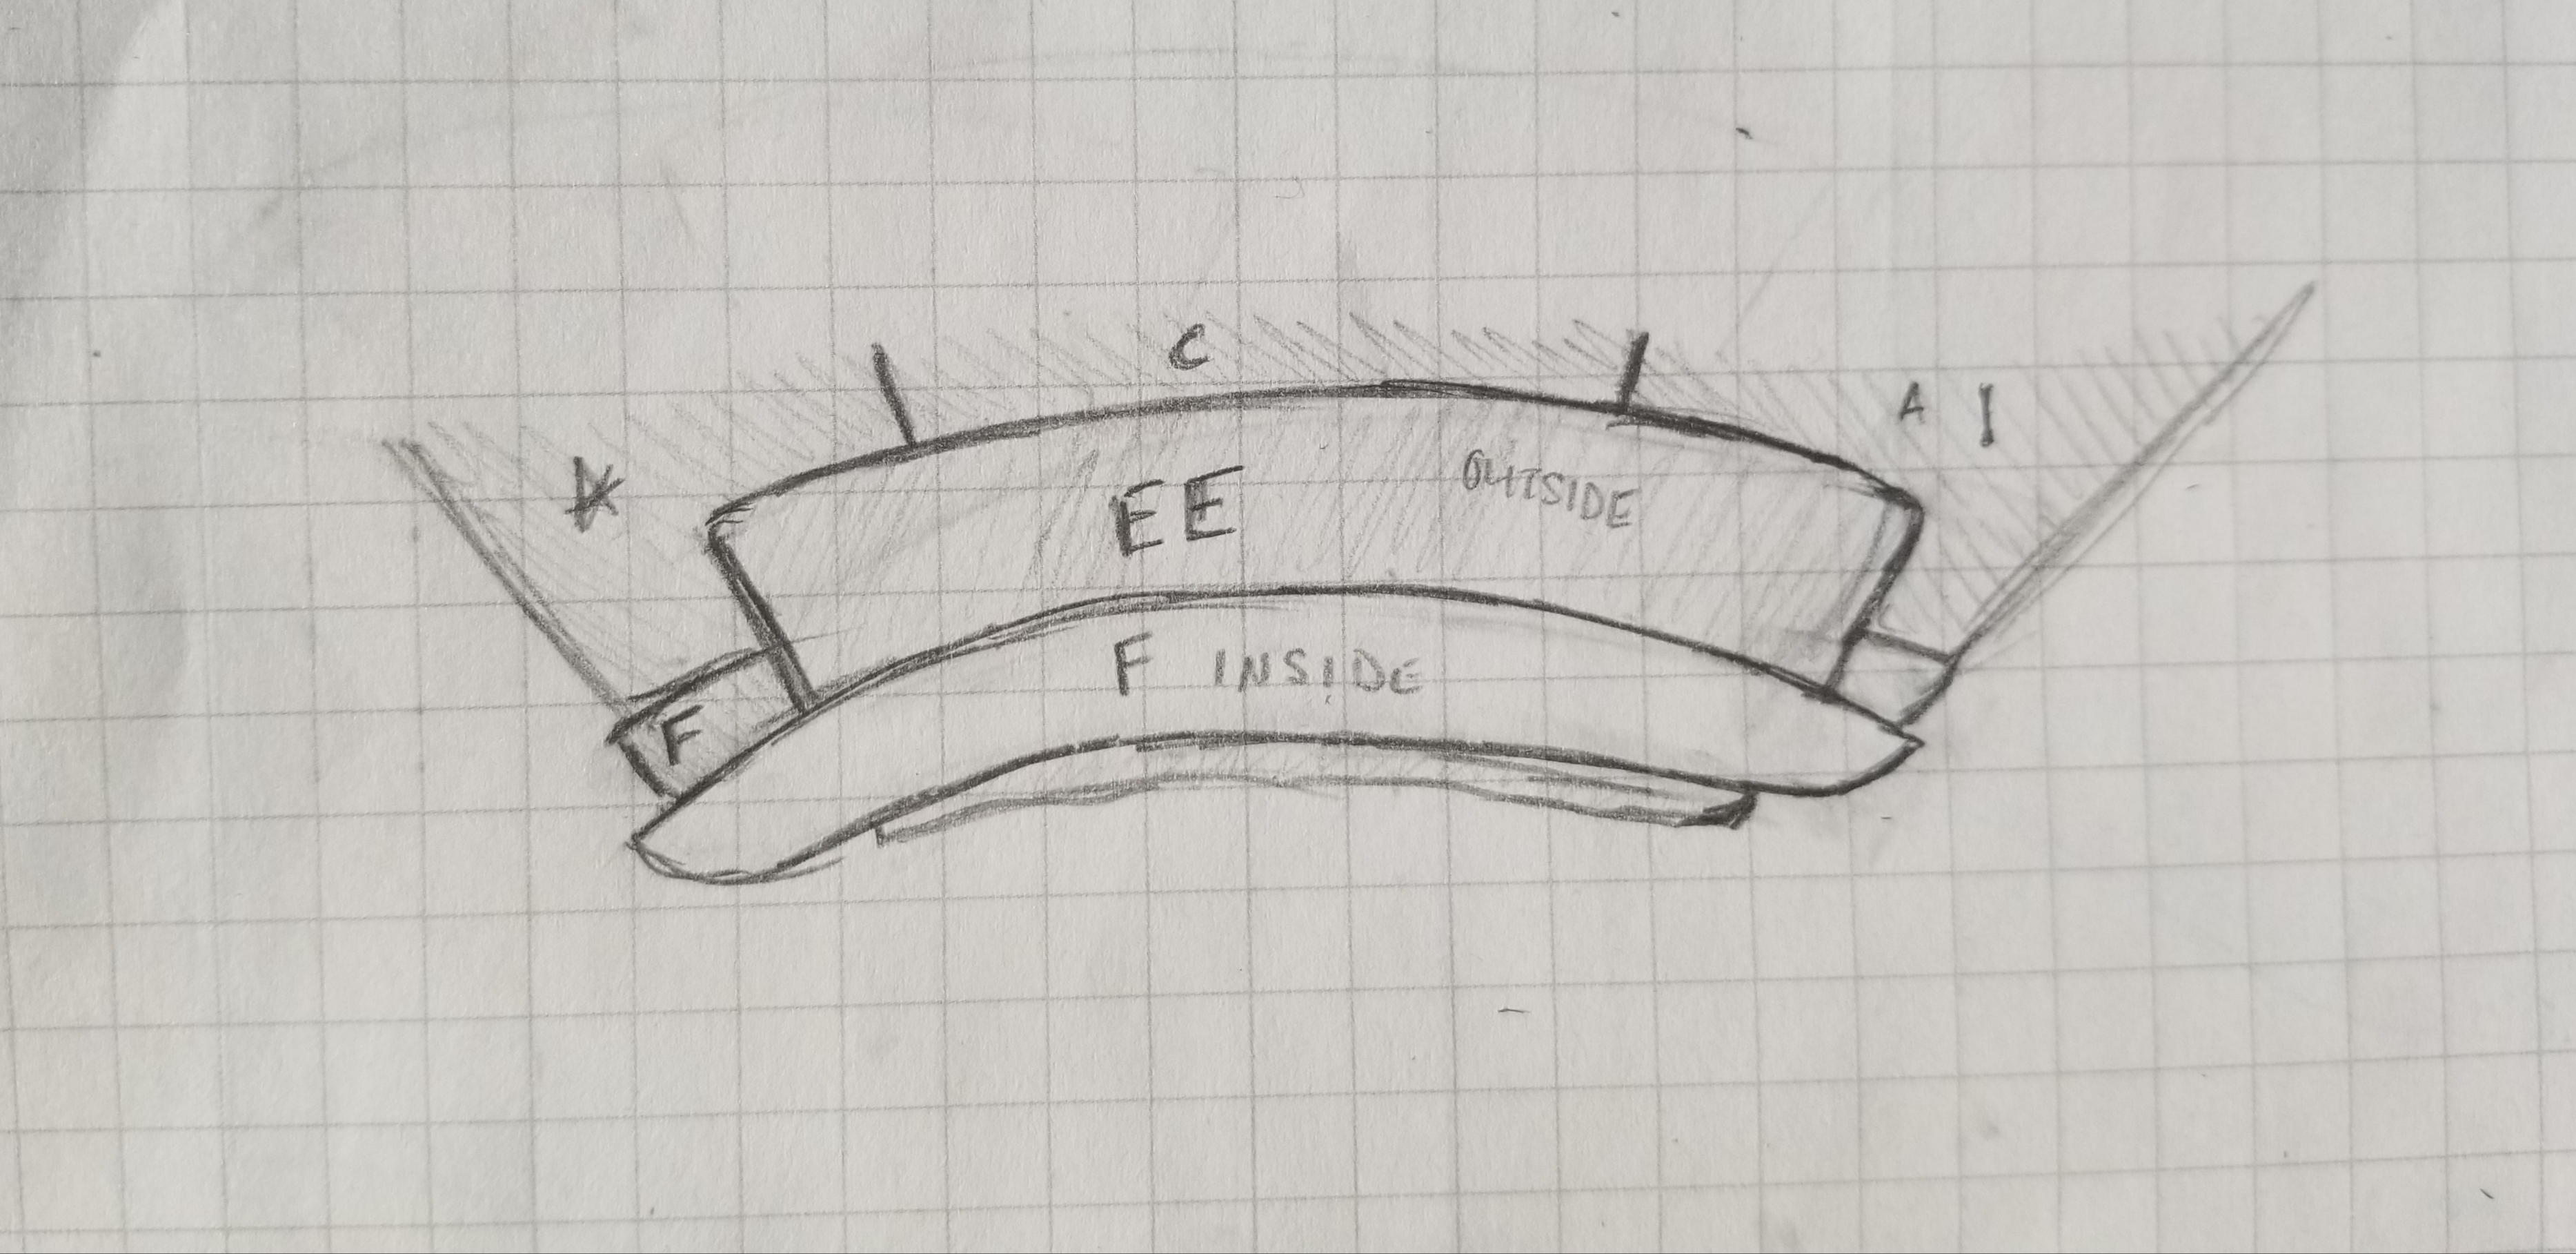
Sew Es together, outsides together. Only sew the top, and sides leaving the bottom (the shorter of the long edges) open. The seam is 1/4 in from the edge.
Turn right side out and iron flat. Sew around the edge, 1/4 in away.
Sew an F to the neckline of the connected As and C. The outside of F will be against the outside of ACA. Sew 1/4 in from the edge. Open and iron flat.
Place EE, F, and F together. The F outsides together. Line up the bottom (still open) edge of EE and the top edges of the upside down Fs. Make sure EE is centered. Sew the long curved edge 1/4 in from the edge.
Open FF and flip right side out. For the F not attached to ACA, fold the unsewn edge inwards about 1/4 in to "clean up" that edge.
Sew along the full edge of FF as close to the edge as possible. This will fully attach the collar to the garment.
Attach Sleeves
Look at D and make sure the right sleeve goes on the right side. The "front" edge would be attached to A and the back edge would be attached to C.
Line up the edges of D and ABC with outsides together. Sew together 3/8 in from the edge.
Iron the seam flat towards the collar. Sew down 1/4th in from the seam.
Repeat for both sleeves.
Connect Front and Back
Line up the sleeves at the armpit. Sew together A to BC and D to D. Sew together 3/8 in from the edge. Sew the edge in one go. Straight up the side then turn the corner at the armpit and keep going down the sleeve.
Iron the seam flat towards the back. Sew down 1/4 in from the edge.
Hem Sleeves and Shirt Bottom
The bottom of the shirt will get two folds. The first fold is 1/4 in, then a second 1/4in fold. Then sew right along the first fold.
The sleeve gets two folds. The first is 1/4 in, the second is 1 in. Sew along the first fold.
Back to Top

